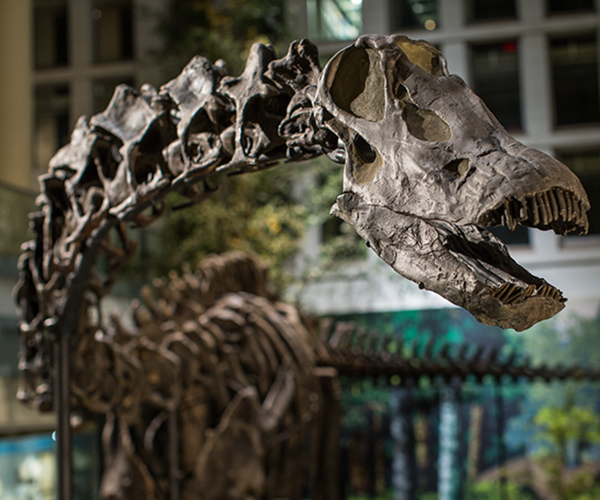
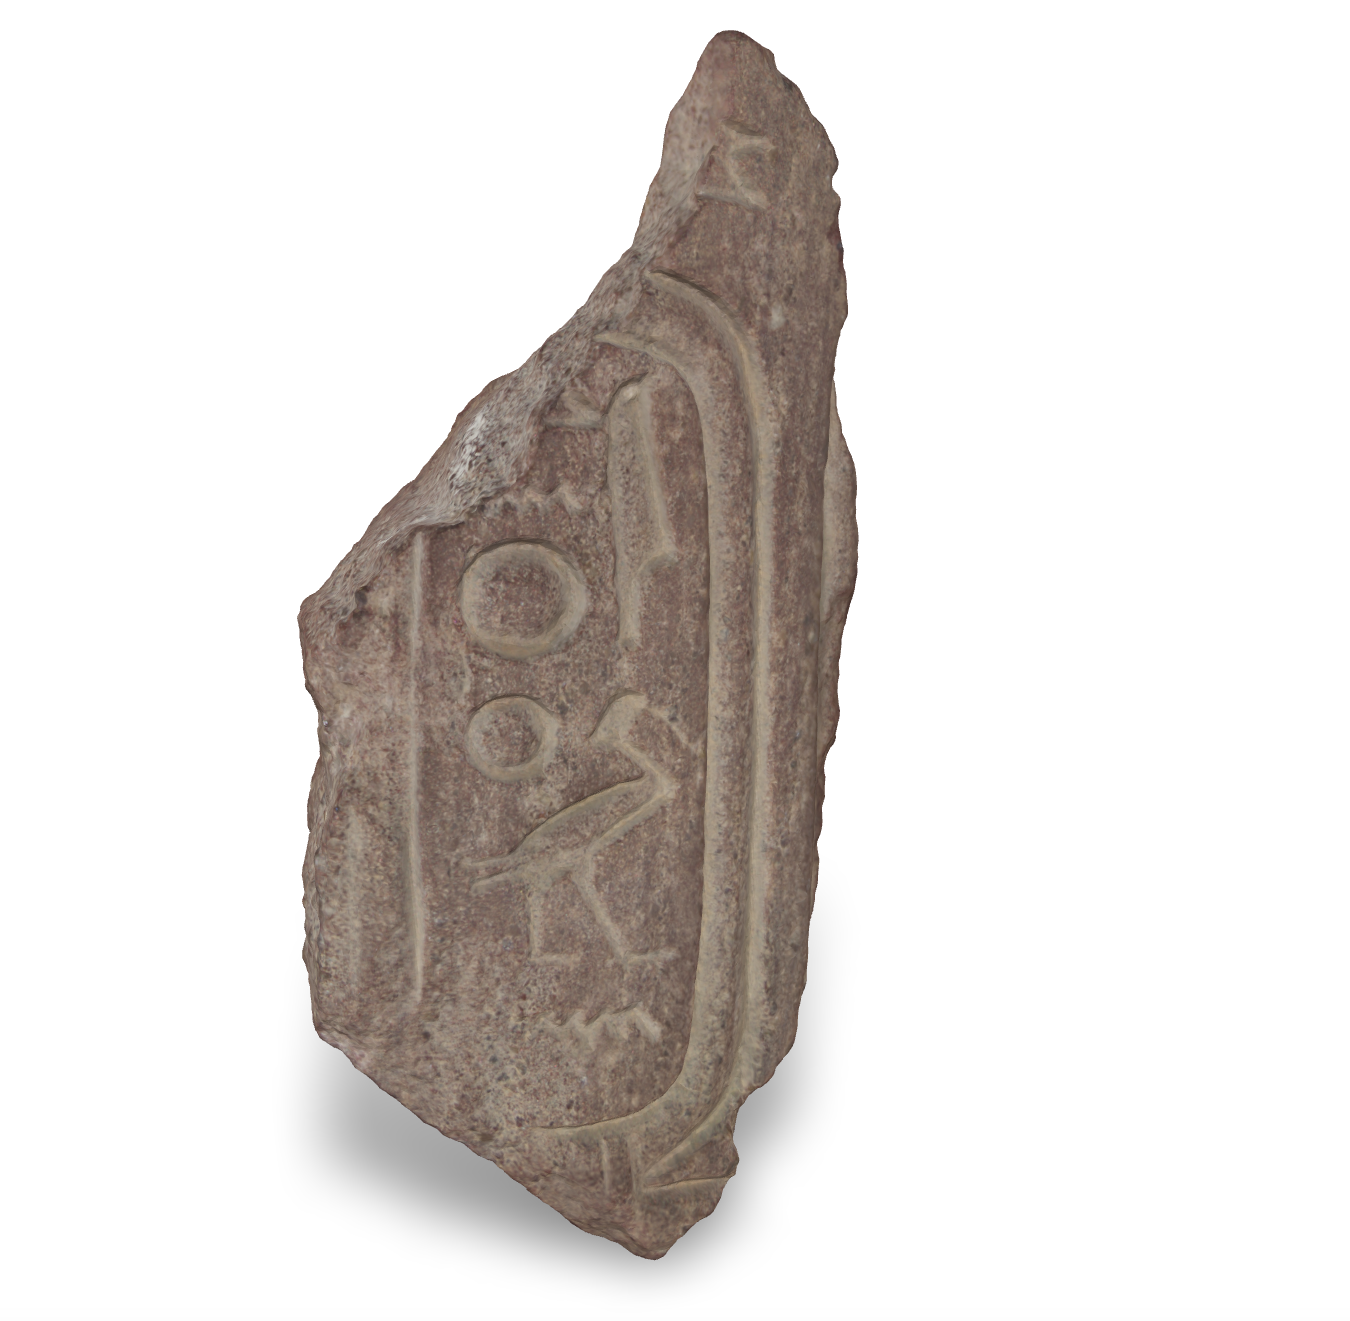
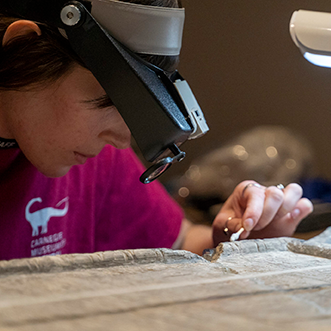
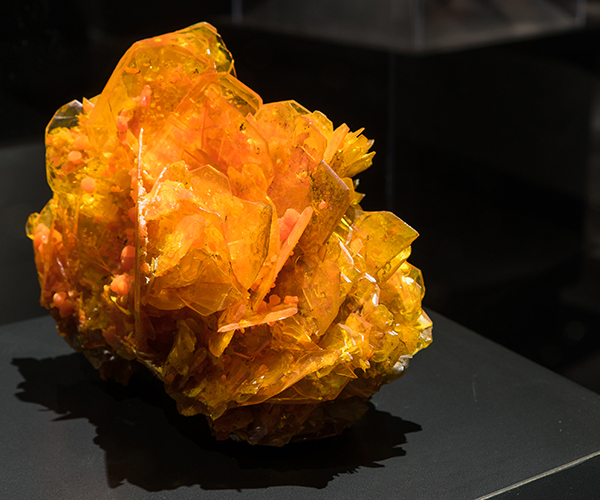
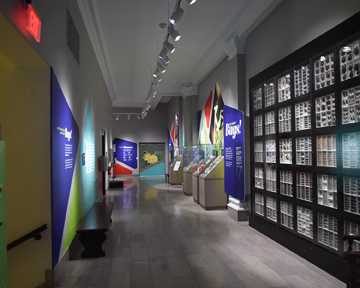
| PaleoLab
Project: Camarasaurus
Click on any thumbnail for a larger image in a new window
Allen
Shaw
posted 8-16-2002 11:36 AM
I
have removed the first dorsal vertebra from the rock and finished
preparing it. Unfortunately, not all of the dorsal vertebra was
in this block. There are other segments of this block in the Big
Bone Room that may contain the remaining portion of the vertebra
or its neural spine.

Front
& Side Views

Openings
of this type reduce weight but retain strength, similar to an
I-beam.

Bottom
View
Yvonne_Wilson
posted 08-15-2002 10:25 AM
Yesterday
I began a new jacket. It is supposed to contain sauropod limb
bones including the radius and ulna (forearm bones) and the end
of a humerus (upper arm bone) the rest of which Allen prepared
out of his last jacket. Here is the unopened jacket:
 
And
I got thus far:

The
curious thing is that we see the end of the humerus that we expected,
but the bone on the lower right looks like a humerus too. And
the third (on the left) might be an ulna. We'll just have to wait
and see.
Another
odd thing about this jacket is that there are 6 paper-wrapped
packages of bone that were included in the jacket. I don't know
yet how they belong to what is exposed. They may be pieces that
came loose while they were wrapping up the fossils, or they may
be complete surprises. It looks like they put in little birthday
presents for whoever was to prepare this jacket. Okay, maybe not.
Allen_Shaw
posted 08-02-2002 11:04 AM
Sauropod
Caudal Vertebrae
These
two articulated caudals (tail) vertebrae were prepared by one
of our volunteers. Here they are finished.
 
Allen_Shaw
07-23-2002 03:23 PM
I
am starting a new project that has been partially prepared sometime
in the past. This project will be a challenge because it has been
sitting around collecting dust for years and now the bone is difficult
to distinguish from the rock. This large mass of bone and rock
contains several dorsal (back) vertebrae from Camarasaurus. The
vertebrae have a spool shape to them with a concavity on one end
and are convex on the other (ball and socket arrangement).
In
the lower part of the image is a dorsal vertebra.
The
damaged dorsal vertebra in this image is located in the upper
part of the block.
I
will try to remove the rock and prepare each individaul dorsal
vertebra.
Yvonne_Wilson
07-24-2002 01:01 PM
This
end with the matrix attached is driving me bonkers. The grade
between the bone and matrix is ever so slight. The bone is the
hardness of a cookie, but the rock is so hard I cannot remove
it with hand tools. So I am using the air scibe all day and vibrating
my forearm and hand nearly to numbness. Sorry to complain so much.
Allen_Shaw
07-23-2002 03:17 PM
At
Last!!! I have finally finished this project. It turned out to
be an almost complete scapula and humerus with a small portion
of anther humerus. I left the scapula in two pieces to make it
easier to handle and move. Here are a few images of the final
project repositioned in the jacket. See if you can find this block
on the map in "a splendid Past" exhibit. It should be located
on the far left side of the map under the number 175/M or 175/12.
You will also notice that the rest of the humerus is in another
adjoining block. Good Luck.

The
humerus is on the far right underneath the scapula.

The
other humerus (finger) under the other end of the scapula.

Yvonne_Wilson
07-17-2002 01:57 PM
Moving
right along, I've got more of the femur together. Here's one end:

And
here's the rest (the tower of bone):

.It's
going together more slowly than I would like, but administrative
gobbledegook took precedence for a while. As in any job...Okay,
back to work,
Allen_Shaw
07-11-2002 11:21 AM
Whew!!
I am finally starting to see some progress from all the effort
I've put into this project. First I removed most of the jacket
covering the bones and then the surrounding rock so that I can
remove the pieces. For the last few weeks I have been removing
small pieces of bone, cleaning them, and then gluing them together
to form larger pieces. I can now start to put these pieces together
with plaster complete the scapula. Meanwhile, I have also started
cleaning and gluing the pieces of the humerus underneath the scapula.
In the last week, I also discovered another partial limb bone
at the other end of the block. I had a good idea that something
else was in this block because of how thick the jacket was on
either end. The scapula is only 1/4"-1" thick across most of its
length and the block is a good 6"-8" thick.
Here
is an image of pieces of the scapula being plastered together
in the sand box.

Here
you can see the partially cleaned and plastered scapula resting
atop the humerus.
 
Although
difficult to see, the scapula had another limb bone hidden under
its other end.

Yvonne_Wilson
07-02-2002 11:24 AM
At
this stage I have everything out of the jacket. (Allen took
this picture before I could clean up at all.) I'm removing the
last matrix off the bone and plastering the pieces together. The
ends of the bone are not well fossilized. They are consequently
quite soft. Also, I'm having a rough time determining what is
bone and what is the surrounding rock. They have a similar hardness
and color. It is largely a matter of judging by feel rather than
anything else. What a pickle...
Yvonne_Wilson
06-13-2002 04:35 PM

This
is where I am now on the femur. There is also a tower of bone
in the sandbox where I am putting all the chunky pieces together.
The bone is cooperating nicely -- the pieces fit well and are
not breaking up too much. I just can't wait until I'm done and
I have to search in our collections for the end of it. It was
prepared out of another jacket a long time ago. Cross your fingers
that I find it easily.
Yvonne_Wilson
06-02-2002 12:19 PM
It'a
a cool new thighbone (femur) jacket. Just from the shape of it
I could tell there is very little matrix on the bone. We could
see some bone through small worn patches on the ends of the jacket
and the bone looked really solid and hard. That's always good
news. But I opened it and it's a bit more broken in the middle
than at the ends. For some reason, that's typical. Take a look:

So
it'll be a little bit of repair work too. Yeah, but it still looks
like fun. I sure like my job.
Allen_Shaw
06-11-2002 02:36 PM
Peter:
Here
are two articulated caudal vertebrae from a sauropod. The neural
arches are broken and separate at present. When repaired they
will be attached to the centra.
   
Allen_Shaw
06-04-2002 12:43 PM
The
scapula block is large and heavy enough that the bone hoist was
needed in order to lift it onto a table. Here you can see several
images of the lift from box to table.
  
When
lifting a large block like this it is important to find a table
that will support it and provide just enough space to make preparation
easy without having to bend over too much. Also, of importance
is placing straps strategically around the whole jacket so it
is raised evenly. Once all these factors are considered and taken
care of, the lifting process is very quick and painless. Now the
most exciting part can begin, opening the jacket. It is often
just like opening a christmas present because you will be the
first person to see what is inside since the early 1900's and
sometimes you will be the first to have seen it in millions of
years.
Here
you can see the jacket opened and the bone exposed. Although it
is hard to differentiate between the jacket and bone, what is
visible is the largest part of the scapula. The "v" (shown with
chisels) at the left of the picture is where the scapula articulates
with the upper arm bone (as seen with Diplodocus or Apatosaurus
out in the Dinosaur Hall).

Allen_Shaw
06-04-2002 12:26 PM
Upon
opening the box, 3 plaster jackets covered with 80 years of coal
dust and other garbage were exposed. The jacket in the upper left
corner contains a partial femur (upper leg bone) similar to the
one currently resting just outside the lab. The long jacket taking
up most of the space in the box is a scapula (shoulder blade)
with a humerus (upper arm bone) below it. Both of which, are in
the same jacket. A small jacket hidden just to the upper right
contains two caudal (tail) vertebrae.
 
After
cleaning all the garbage and dust off the jackets, we then physically
lifted the femur and placed it on the table to be prepared.
Yvonne_Wilson
06-02-2002 12:19 PM
It'a
a cool new thighbone (femur) jacket. Just from the shape of it
I could tell there is very little matrix on the bone. We could
see some bone through small worn patches on the ends of the jacket
and the bone looked really solid and hard. That's always good
news. But I opened it and it's a bit more broken in the middle
than at the ends. For some reason, that's typical. Take a look:

So
it'll be a little bit of repair work too. Yeah, but it still looks
like fun. I sure like my job.
Allen_Shaw
06-27-2002 10:15 AM
As
preparation of the scapula proceeds, the humerus underneath becomes
more visible.
 
Allen_Shaw
05-22-2002 10:46 AM
This
box, dated to the early 1900's, contains several blocks instead
of just one large block. The skeletal elements (bones) found in
these blocks are a humerus (upper arm bone), a scapula (shoulder
blade), caudal (tail) vertebrae, and a femur (upper leg bone).
The specimen is tenatively designated as Camarasaurus but we will
not know until we open the jackets.

Allen_Shaw
05-21-2002 10:54 AM
AT
LAST!!! The large block is finally empty. Although it is empty,
the bones removed are still undergoing cleaning and gluing. I
will be working on the bones from this block for another week
or so. Here is the last image of this big block.

If
you look on the quarry map (located in 'a splendid past' exhibit),
this block can be found on the far left section with the number
175/I.

Yvonne_Wilson
05-15-2002 04:18 PM
In
the basement lab, Norm is making the new cast. He has the upper
portion almost done. Just a jaw to go.
Yvonne_Wilson
05-15-2002 03:52 PM
The
jacket is empty. I have to get this rib off the hunk of rock it's
stuck to, plaster the cracks in the rib, and do some final touch-ups
to the various bits and pieces from this jacket. Then it's on
to a new challenge!
Yvonne_Wilson
05-07-2002 11:03 AM
We
still don't have any idea what the top bone piece from this little
jacket is. It's flat and has two ridges that we thought might
help us identify it, but they didn't really help. So I am left
with a UFO (unidentified fossil object).
The
rock around the rib is SO HARD that I did have to pull out the
impact hammer on Sunday. It broke the rock in two but I couldn't
get it any smaller than a volleyball. I finally started wailing
on it on the floor with the crack hammer. And about half an hour
later, just before I wore myself out, it popped. A golfball-sized
chunk skidded across the floor to the other side of the room too.
Wouldn't you know it that the rock had nothing more in it? Arrgh!
The
latest find is part of a limb bone. It was split right against
the jacket, so we may or may not be able to find it's counterpart
either in the collection already or in another jacket if it hasn't
already been prepared.
Allen_Shaw
05-07-2002 09:36 AM
Wow!!
Talk about a pancake. This vertebra (shown in the previous post)
has seen some distortion. Vertebrae are typically round and spool
shaped but this one has been smashed and distorted. Notice the
thickness of the vertebra and the elliptical shape.

Along
with being crushed the vertebra has also been distorted laterally.
The opening seen below should be visible in the same area on the
other side. Instead, the distortion has closed and moved the opening
high up on one side where it is almost indistinguishable.
 
Allen_Shaw
04-26-2002 12:43 PM
Cool!!!
A small (1 inch long) phalange (finger/toe bone) probably from
a theropod dinosaur. Finding it was somewhat by chance. As we
work through the rock to get to the bone, large portions of barren
rock is thrown away. By breaking up these large portions into
smaller chunks we make sure that no small fossils are overlooked.
This phalange was found as I broke the surrounding rock before
I was about to throw it away. Small pieces of bone have been discovered
like this before but they often are well rounded and unidentifiable.
 
Yvonne_Wilson
posted 04-24-2002 11:15 AM
I
opened a jacket that arrived in the same crate as Allen's block
did back in the 19teens. It may or may not contain Camarasaurus
material. The jacket is small -- it only weighed about 385 kilograms
(about 175 pounds). What I found immediately was a number of bone
fragments by a large crack. The crack probably developed in the
jacket either in transport or while in storage.
I've
pieced most of them back together but the bone isn't complete.
I really am unsure what it is yet.

I've
also come across two parts of ribs in the matrix. They are very
hard and much better preserved than the other bone. The matrix
they are in is also much much harder there. I tried to break open
a softball-sized chunk but a hammer wasn't enough to crack it.
I'm sort of hoping that I have to pull out the air hammer...MMM
POWER TOOLS...but I doubt it. It's so hard to avoid breaking the
bone using such force.
Allen_Shaw
posted 04-24-2002 09:38 AM
At
last. This block is coming to a close. As you can see here, there
is just one large section of rock left. If you look towards the
left of the rock section you will see bone.

This
image is a closeup of the bone mentioned above. It is a vertebra
of a juvenile or subadult dinosaur. We can tell it is a juvenile
because the neural spine is not fused to the centrum. The evidence
of this is seen in this image-The corrugated bone surface is where
fusion of the upper and lower part of the vertebra would have
taken place similar to interfingering and fusion that occurs between
bones in our skull as we get older.
 
Yvonne_Wilson
posted 04-07-2002 04:34 PM
We
finished the mold, let it dry and pulled it off the cast. It didn't
go exactly as planned. We had to actually use a hammer to break
elements on the back of the skull to get the mold off. So those
had to be repaired with plaster and paint.
The
repairs turned out quite well if I say so myself. I got a painting
lesson from our Scientific Illustrator, Mark Klingler. (You can
see some of his work near the bugs at the rear of the third floor.)
I was never much of an artist but the skull looks as good as new.
We
sent the mold to an outside contractor to make the new cast. It
should come back in about two weeks.
Allen_Shaw
posted 04-02-2002 09:06 AM
Finally,
we have finished the long process of adding latex to the Camarasaurus
head. The plaster jacket has been poured over the latex and we
are now separating the pieces and pulling the latex off the skull.
Finished
latex layer being covered with plaster.
  
Mold
pulled off of lower jaw.

Closeup
of teeth from lower jaw mold.

Allen_Shaw
posted 03-23-2002 10:36 AM
We
have successfully placed a plaster jacket over the latex covered
portion of the skull. Once we turned the skull over and cleaned
it, we now begin the process anew of adding layer after layer
of latex until it is strong and durable on the new sides.
Here
the skull has been turned over and cleaned in preparation for
the top to be covered with latex.

A
closeup showing the jacket, latex, and uncovered skull.

Liquid
latex just brushed onto the skull.

Closeup
of the latex covering the skull. The latex has a consistency similar
to elmers glue.

Allen_Shaw
posted 03-23-2002 10:31 AM
Phew!!!
I finally made it back to preparing the big block. This last week
or so has been exhilarating and nauseating at the same time. A
good portion of our time has been used on the making of the Camarasaurus head mold seen under the fume hood. I have placed a few images
of what we have been doing with the mold within its own post,
so check there for an update.
Yvonne_Wilson
posted 03-14-2002 12:32 PM
Allen
and I helped out in layering the smelly liquid latex. It takes
20 coats to make it thick enough. When we finished that, Peter
had to shape sticky wax against some portions. The next layer
will be plaster and burlap, which is very stiff. If it is placed
on sections that are underneath the bone at all, when the plaster
jacket is pulled off it will take the bone off with it. The sticky
wax fills in the areas below the bone so that the plaster won't
get underneath bone when it is put on. That way we can keep our Camarasaurus head intact.
Allen_Shaw
posted 03-13-2002 09:03 AM
This
block contained nothing but ribs until I found this ?dorsal vertebrae.
The dorsal vertebra are located along the back. A vertebrae can
be seperated into two parts-the neural arch and spine (red) and
the centrum (green) (dinosauria.com)

One
interesting feature of this vertebrae is the opening up of the
internal portion of the centrum. This cavity may have been filled
with air, lightening the bone during the life of the dinosaur.
This is a view from above looking down into the centrum.

It
may have helped the dinosaur but the very thin nature of the bone
makes preparation more tedious and difficult.
Yvonne_Wilson
posted 03-14-2002 12:32 PM
Allen
and I helped out in layering the smelly liquid latex. It takes
20 coats to make it thick enough. When we finished that, Peter
had to shape sticky wax against some portions. The next layer
will be plaster and burlap, which is very stiff. If it is placed
on sections that are underneath the bone at all, when the plaster
jacket is pulled off it will take the bone off with it. The sticky
wax fills in the areas below the bone so that the plaster won't
get underneath bone when it is put on. That way we can keep our Camarasaurus head intact.
Yvonne_Wilson
posted 03-07-2002 03:46 PM
Finally
I found where a few more loose pieces fit onto my vertebra. Fossils
can be the ultimate jigsaw puzzles. Still, a good portion of the
bone is not represented. I have a number of pieces that tumbled
out of the jacket at the start as well as some that were deliberately
placed away from the bone within the jacket. It can be frustrating.
Here is a picture of the nearly completed project.
Allen_Shaw
posted 03-06-2002 12:25 PM
Here
are a couple of examples of finished bones. The gaps and spaces
within the rib have been filled in with plaster after all the
rock was removed. The following image shows what the ribhead
looks like upon completion. This portion of the rib connects directly
to the vertebral column as seen on the mounts in dinosaur hall.
 
Yvonne_Wilson
posted 02-28-2002 03:52 PM
Today
I am plastering the gaps and holes in the bone. We color plaster
with poster paint and pour/wipe/scoop it into the spaces. The
plaster helps to support and hold the bone together.
Once
the plaster dries, I take off the excess by scraping with a pin
vise or by scrubbing with a toothbrush.
It's
sort of messy, makes colorful additions to your clothing, and
tends to poof up your nose when you least expect it. Okay, but
it is fun.
Allen_Shaw
posted 02-28-2002 10:35 AM
The
slowest and most tedious part of the whole preparation process
is the removal of the last vestiges of rock still adhering to
the bone. I have finished the preparation on two of the ribs removed
earlier and now I am working on the removal of another rib from
the block and final prep of the caudal (tail) vertebrae.
Allen_Shaw
posted 02-22-2002 09:16 AM
At
last. With the completion and filling of our large sandbox, I
can begin to put the larger pieces of bone together without them
falling over. Final preparation of the bone is accomplished by
placing plaster within any cracks or gaps. Primarily, the plaster
strengthens the bone and secondarily makes it look more presentable.
Once I have finished glueing and plastering the elements removed
from the jacket previously, I will then continue to remove more
bone.
Yvonne_Wilson
posted 02-21-2002 07:55 PM
Latex,
latex, stinky latex...
It's
a good thing that we have a fume hood in the lab that exhausts
any harsh smells outside. Peter has been painting layers of liquid
latex onto the skull. Each layer has to dry before the next is
added. It stinks and it takes a stinking long time. When enough
layers have been applied, he will make a support for the flexible
latex in order for it to hold its shape.
The
support is often a plaster jacket just like those that protect
the fossils while they are in transit from the field. You can
see these in the lab. They are burlap layers soaked in plaster.
But
in the meantime, we suffer with the stinky latex.
Yvonne_Wilson
posted 02-21-2002 07:33 PM
Surprise,
surprise!
I
thought I was just delving into the final touches, working on
some loose blocks from within the jacket. It turns out that I
had another projection from my vertebra tucked inside one of these
blocks. It didn't look like anything much on the surface, just
some scrap bone that really wouldn't be missed if it were tossed
out. I kept scraping away and revealed 3 dimensional curves. Much
more than I expected from the loose blocks. It's a nice addition,
but unfortunately, since I don't have a good contact point between
it and the remainder of the vertebra I have to leave this new
find loose beside the bone. You can't guess at the contact because
you might be dead wrong.
Still,
it was a nice find for the day.
Yvonne_Wilson
posted 02-19-2002 11:59 AM
Once
the vertebra was freed from the rock and the jacket, it was time
to glue all the loose pieces together. Once I finish that, this
project will virtually be done. It will likely need a little bit
of final clean up, but then it will be done!
Yvonne_Wilson
posted 02-19-2002 11:51 AM
The
bottom 3 inches of plaster were not empty but held what is 90%
rock, not bone. So I went to a good amount of trouble for not
much payoff. I had to cut into the jacket with the cast cutter,
chisel off the layers that the cast cutter could reach into, then
cut into more layers. Repeat this process about twenty times and
you free the rock! Those guys sure knew how to protect a fossil
-- the plaster was often two inches thick.
Allen_Shaw
posted 02-14-2002 07:12 PM
The
vertebrae I found before is fractured into many pieces making
the preparation of it quite difficult. One interesting feature
of this vertebrae is that it is hollow with thin struts of bone
strengthening the exterior. The bone is very thin (1/8th of an
inch) in places and quite brittle. The pieces are first put together
and then the rock is removed from the outside of the vertebrae.
Allen_Shaw
posted 02-09-2002 11:37 AM
At
last, something besides ribs. Within the last couple of days I
have begun to uncover what appears to be a caudal vertebrae. If
my initial identification is correct, then this vertebrae would
have been located towards the middle of the tail of Camarasaurus.
Allen_Shaw
posted 02-05-2002 08:35 AM
Interesting...I
have uncovered another ribhead with a good portion of the rib
with it. The last two or three feet of the rib appear to be lost
during field collection. This ribhead is larger and more robust
than the first one. The rib itself is about 5 inches wide and
at least an inch thick. The strange thing about this rib is that
there are still sections of the head that are very thin and I
am unsure if this is a feature seen in the individual Camarasaurus or a product of erosion.
Yvonne_Wilson
posted 01-30-2002 04:35 PM
The
backbone cleaned up fairly well. I decided to flip the whole thing
and solidify/glue it from the backside. I thought that I had it
all together...when I flipped it, a lower layer came off with
the jacket. That layer was strangely separated from the rest of
the fossil by a piece of canvas. I don't quite understand why
the original collectors did this. Now I have to keep gluing the
bone, piece the stubborn jacket-hugging layer back on, and do
some final clean up. This project shouldn't last forever. I want
to crack into the three inches of lower plastar to see if it holds
anything or if it is just an insurance policy for the specimen.
We'll find out.
Allen_Shaw
posted 01-30-2002 09:26 AM
Once
I have finished glueing all the pieces together I will fill in
the remaining openings with plaster to add strength to the bone
and make it BEAUTIFUL .
Allen_Shaw
posted 01-30-2002 09:23 AM
The
ribs are finally going together into good sized portions that
can be easily managed. I am continuing to remove rock from the
block and in the process uncovering more ribs. It is amazing to
me that so many ribs are found in this one block. Within previous
blocks, ribs were found entangled with other more robust elements
but in this block there are only ribs (so far ). The ribs being
removed are all different sizes and shapes (probably representing
many different locations and portions within the dorsal area of
the skeleton).
Yvonne_Wilson
posted 01-24-2002 04:17 PM
By
attacking from a different direction, I was able to trace the
rim of the bone that seemed to grade imperceptibly into the rock.
The edge of the vertebra is very thin and fragile. And of course
the matrix is very hard, which makes is particularly fun!
Allen_Shaw
posted 01-24-2002 08:56 AM
I
finally removed the ribhead and in the process uncovered more
bone...probably a rib. Now I will proceed to clean the ribhead
and glue all the many pieces back together. I was reminded the
other day that my little sand box looks like a mini stonehenge
with all the bones I am glueing together.
Allen_Shaw
posted 01-19-2002 08:44 AM
There
are a plethora of ribs in this jacket. It seems that when I remove
one another is quickly found to take its place. I am currently
preparing the bone I removed earlier. It is a tedious process
of removing matrix and constantly glueing pieces of bone back
together. During this process it is very important to always reduce
the number of small pieces by glueing them together as soon as
they break off. Otherwise the number of small pieces builds up
and one forgets where they once went. IT IS FUN!!!
Yvonne_Wilson
posted 01-17-2002 05:38 PM
In
the same crate as Allen's Camarasaurus rib jacket, there
were packed two smaller jackets. The smaller one was not entirely
encased in plaster. The fossil collectors left the top open to
the air. Remember that this was collected back in the 19-teens
or so. Pittsburgh was soot city. I had 80 years of soot and dust
built up on the top surface of my project. It discolored the matrix
and made the bone hard to see. After vacuuming off and staring
at the jacket for a long time, I realized that the jacket is mostly
bone. It is a dinosaur vertebra.
The
top surface held a jumble of loose blocks of bone. I've been trying
to piece them together with limited success. The matrix itself
is hard, but not terrible to work with. With the airscribe it
comes off rather quickly. My only problem is that one portion
of the bone is the identical color to the matrix. I almost feel
like I'm guessing at the bone margin at that point. It just sort
of grades into the matrix with no definitive outline. It's a challenge...
Allen_Shaw
posted 01-16-2002 10:40 AM
Peter
started making a latex mold of the adult Camarasaurus head.
We will be displaying a touchable cast of this in the area outside
the PaleoLab. The first step is to create a "dividing flange"
that will form the boundary of the two halves of the mold. Then
he will paint layers of latex on the specimen and flange. The
whole process will probably take about 6 months working between
6 and 10 hours per week.
Allen_Shaw
posted 01-16-2002 08:58 AM
As
for the preparation of this block, it is proceeding with some
difficulty. Some of the bone is about 1/8th of an inch thick while
other bone was lost during collection. By removing the ribhead
I uncovered more bone that is also in desperate need of attention.
As it stands now I am still engulfed by ribs.
Allen_Shaw
posted 01-12-2002 12:48 PM
Interesting...One
of the ribs is actually a complete ribhead (the very top portion
of the rib that connects to the vertebra).
Allen_Shaw
posted 01-12-2002 09:11 AM
Hmmmm...
The field notes of Earl Douglas describe the contents of this
block as being indeterminate. That description fits very well
with the fragmentary bone showing up within the block. With the
removal of rock, a number of bones have begun to appear. Upon
first examination these bones appear to be ribs of varying size
and thickness haphazardly oriented within the rock. Ribs, ribs,
and more ribs!!! Ribs provide very little information about the
type of dinosaur represented so are not very exciting to work
on. This block will require lots of rock to be removed to find
any substantial remains like vertebrae or limb elements but for
now the ribs await.
Allen_Shaw
posted 01-10-2002 09:24 AM
I
am new to Pittsburgh and its amazing paleontological history.
I will be working on dinosaurs within the lab. I recently opened
a new block containing what is thought to be elements from Camarasaurus.
As
you can see, there is very little bone exposed and not enough
to properly identify what skeletal elements are showing. The bone
that is showing is tan to dark brown in color with a redish brown
"rust" stain surrounding it within a greenish gray sandstone matrix.
You can see this on the edge of the block closest to the window.
As I continue to prepare this block, I hope to encounter more
substantial remains of Camarasaurus, so stay tuned.
Return to Preparator's Journals
|