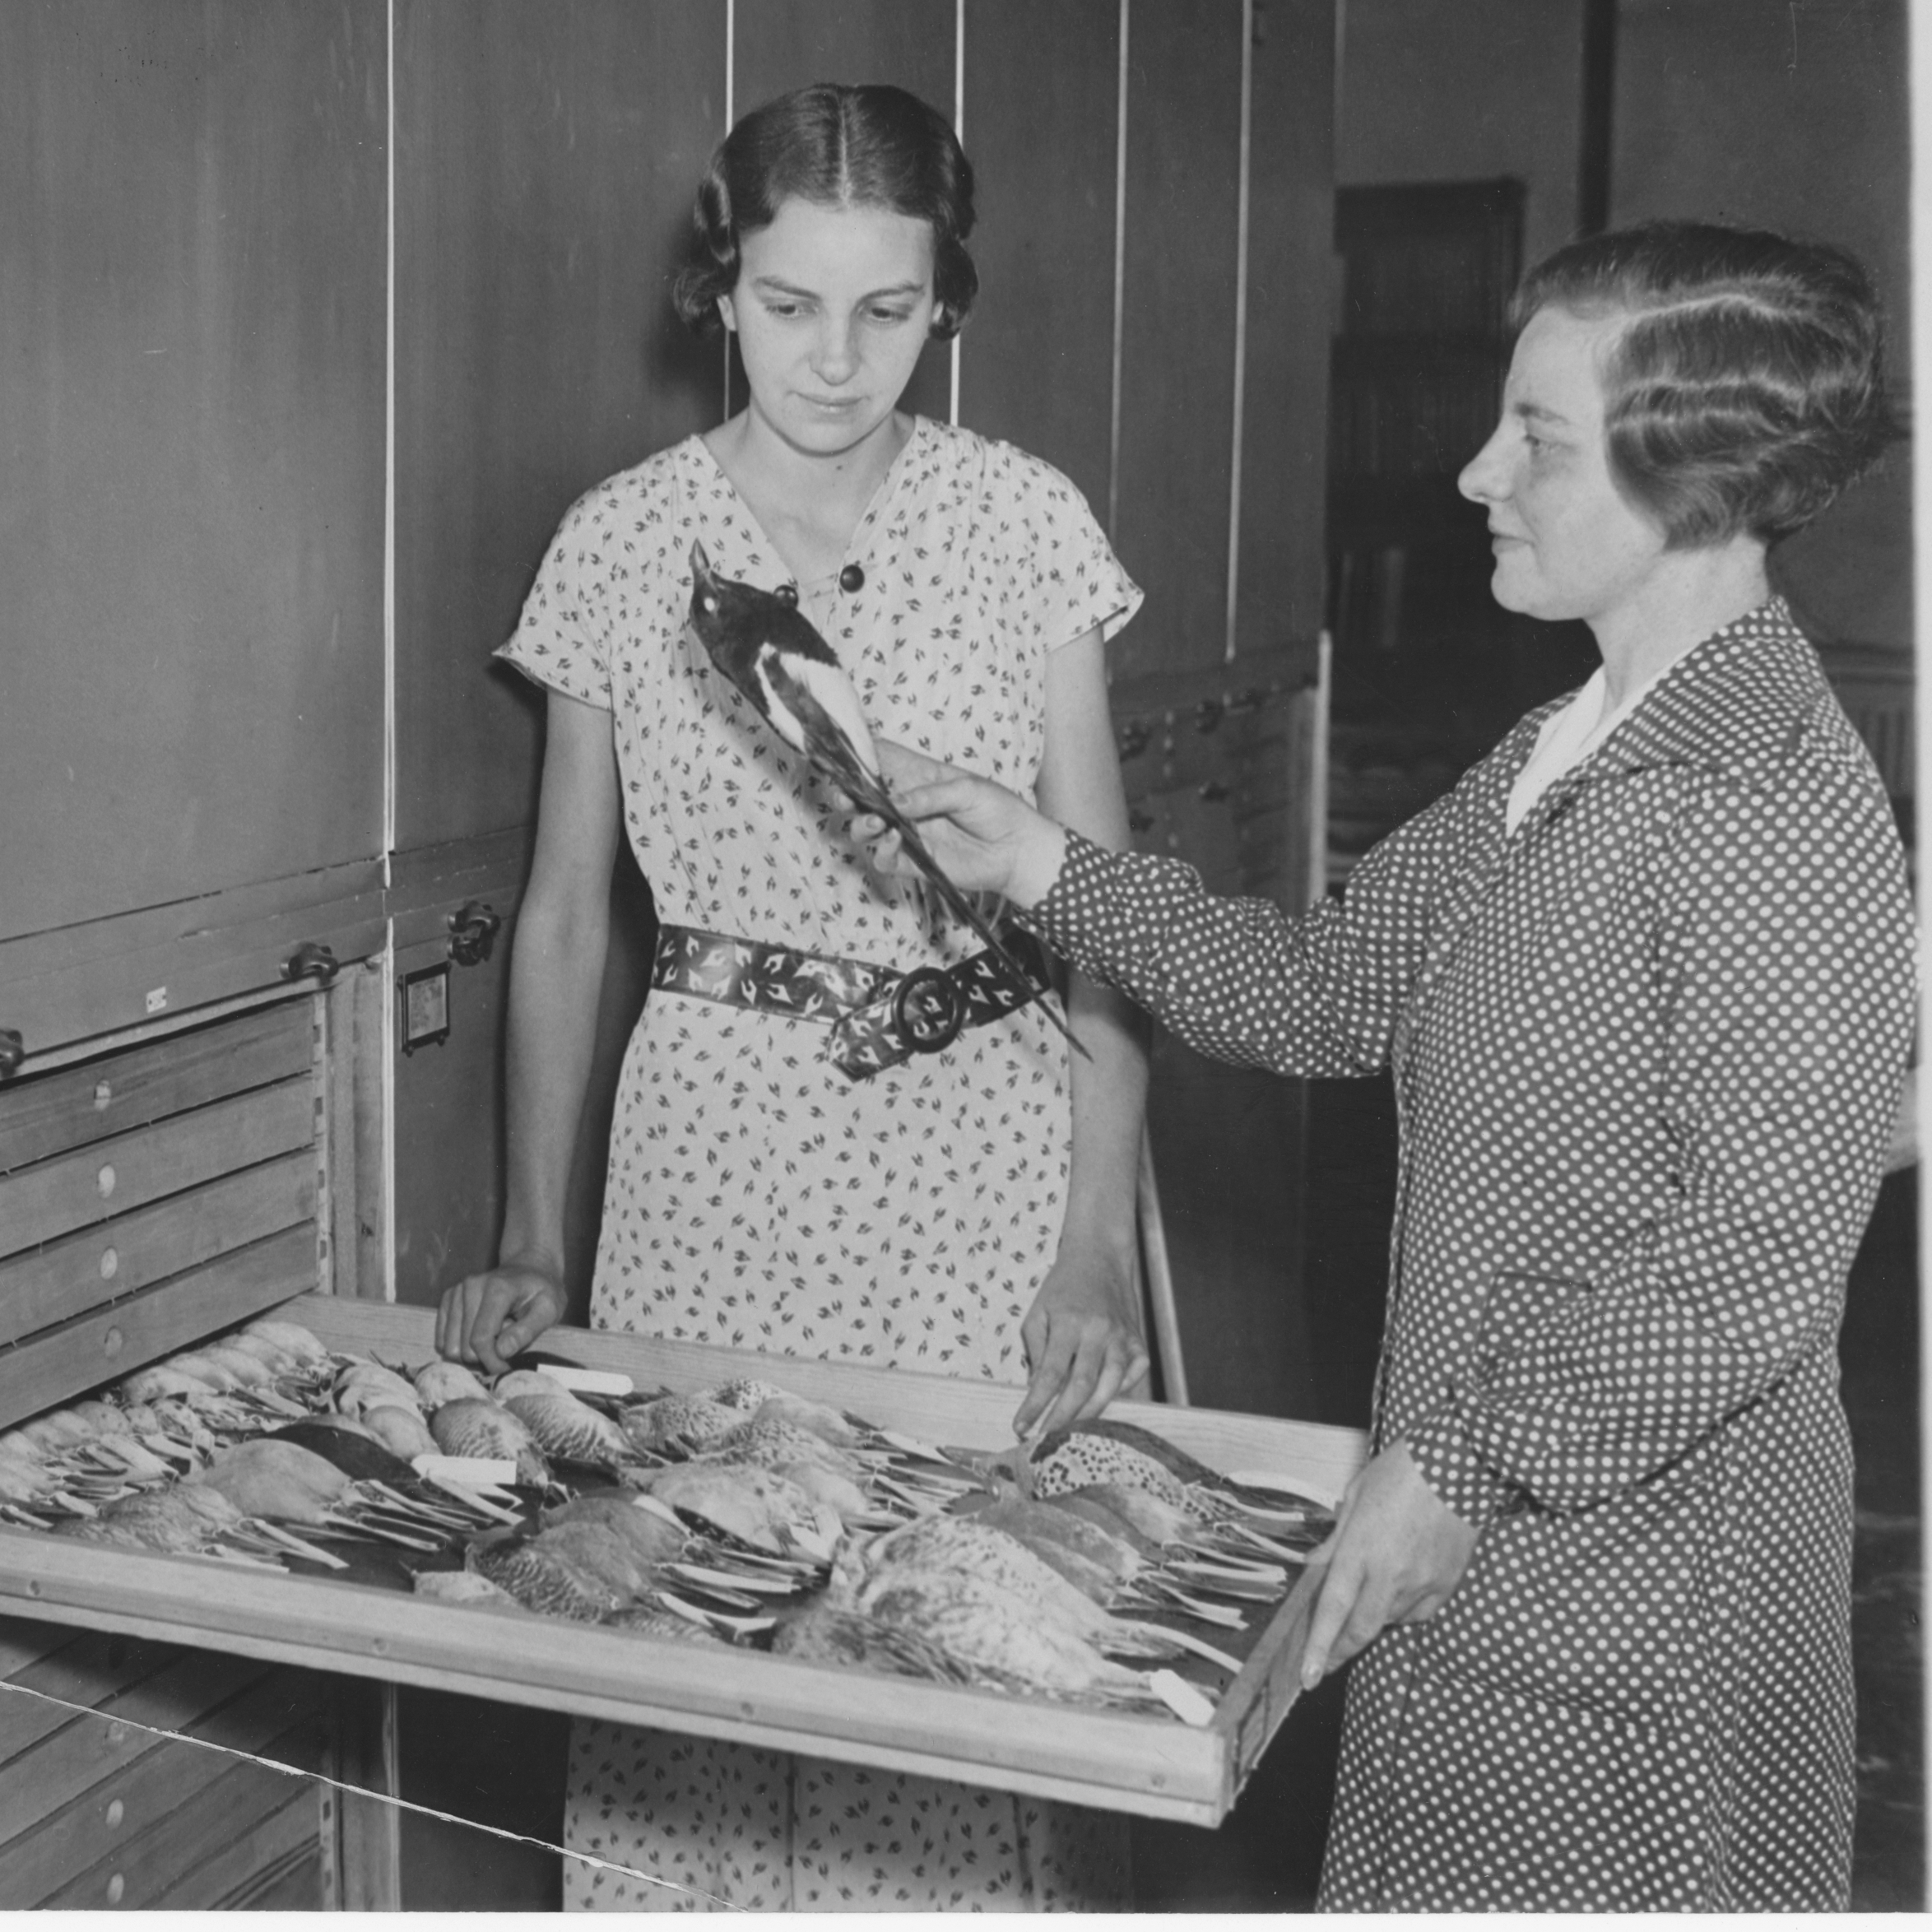
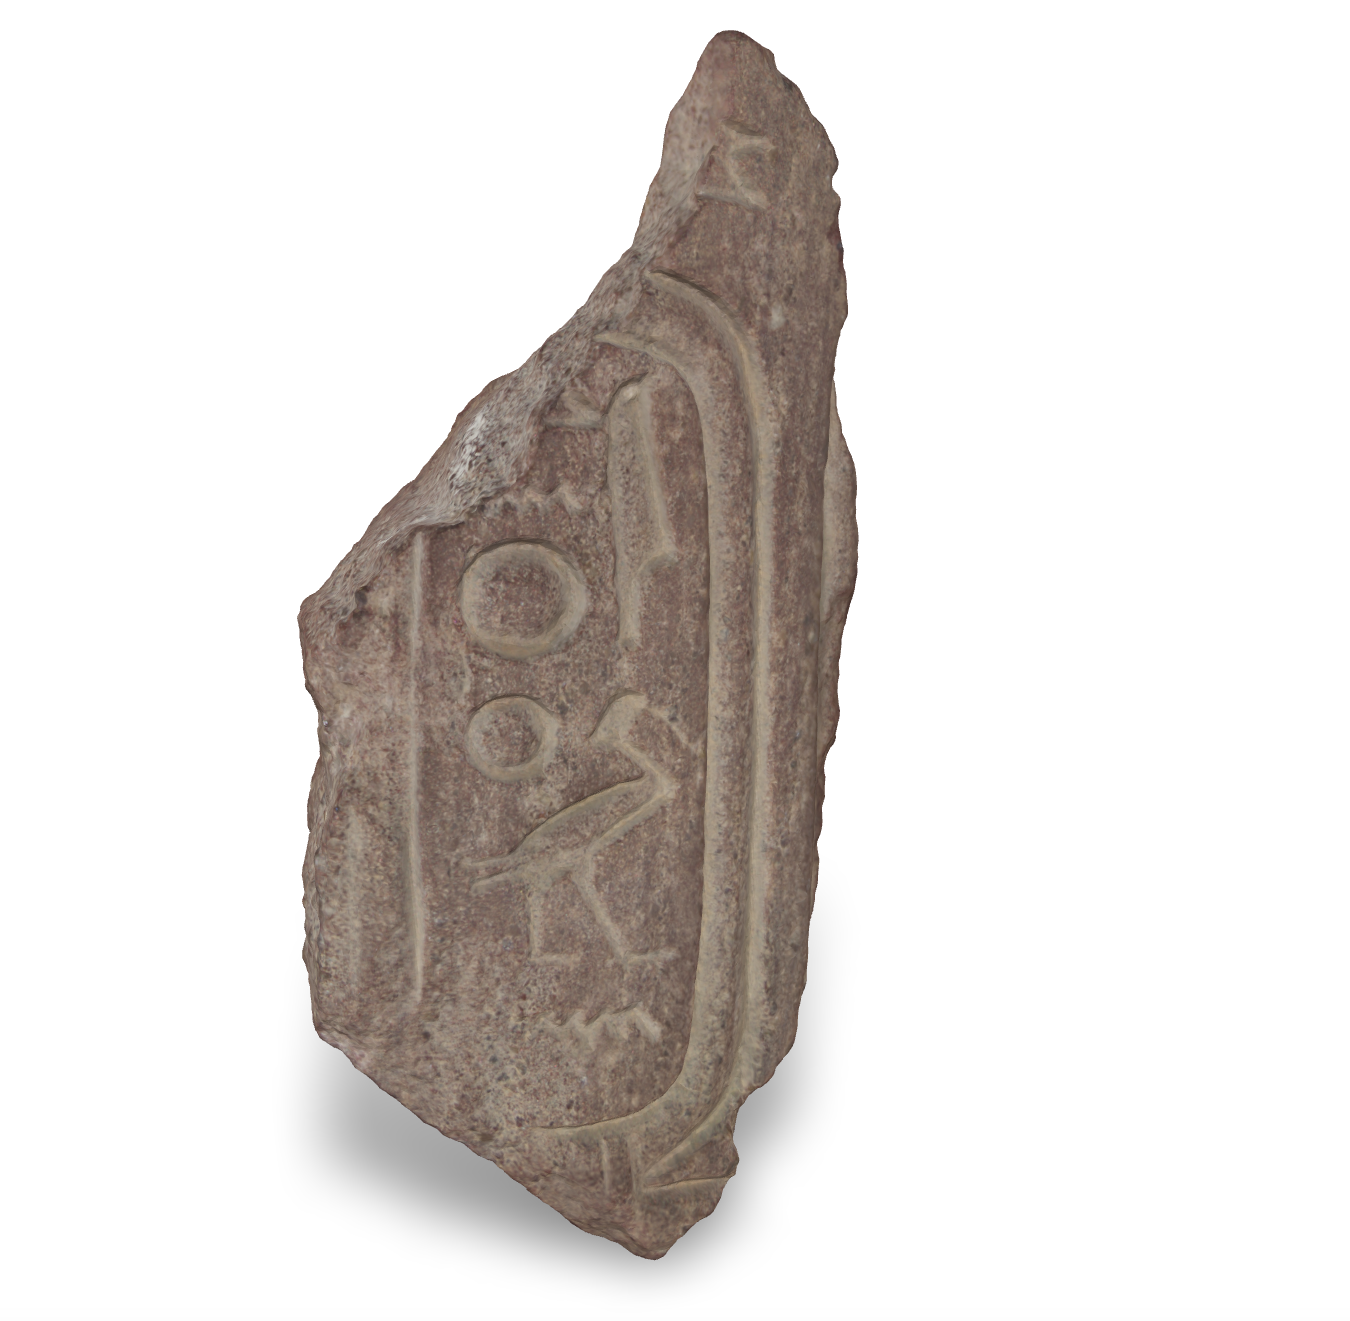
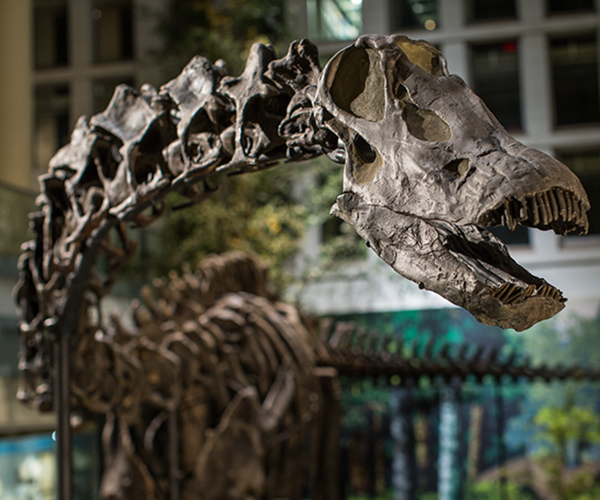
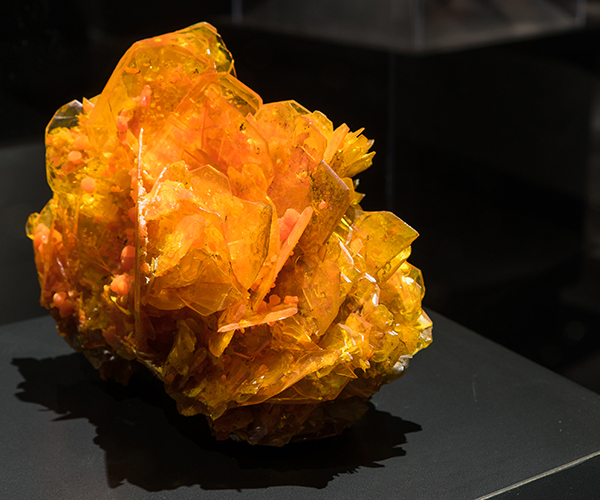
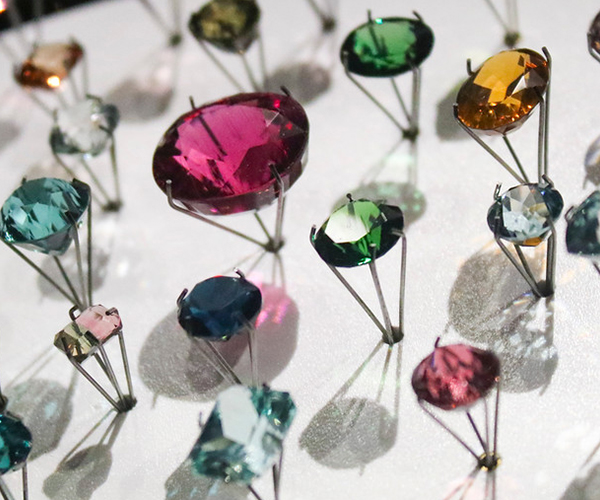
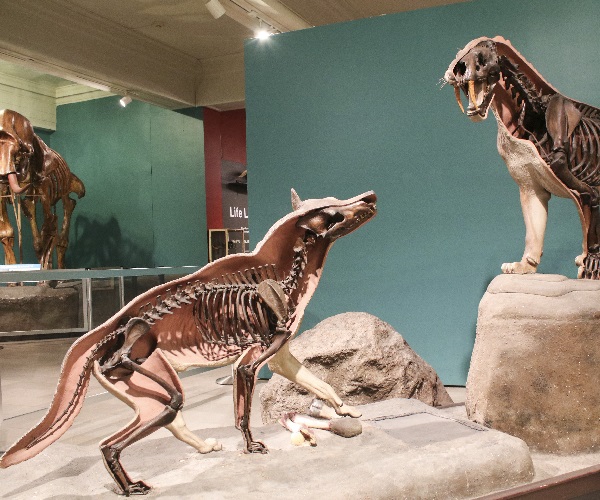
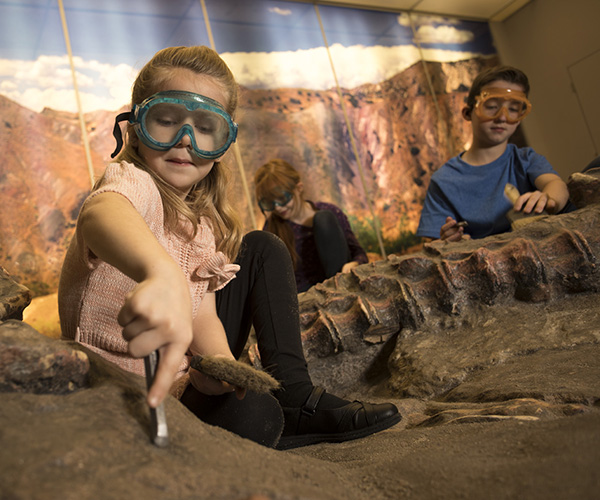
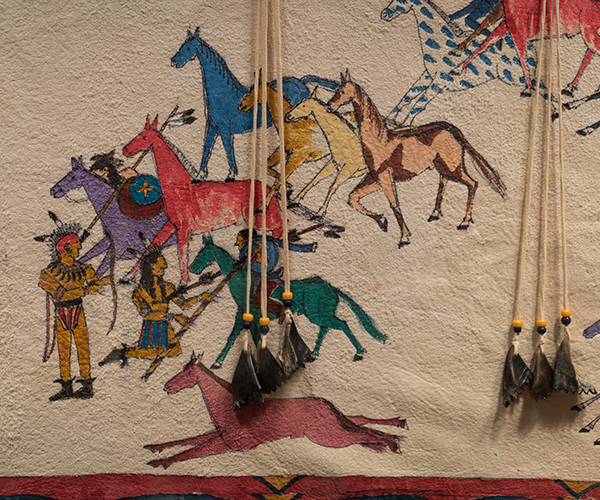
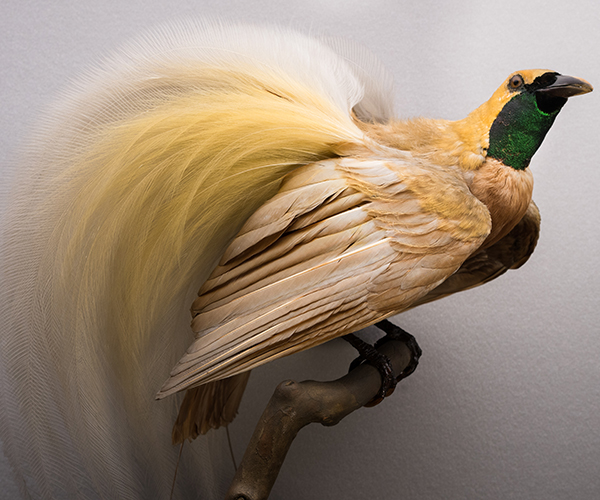
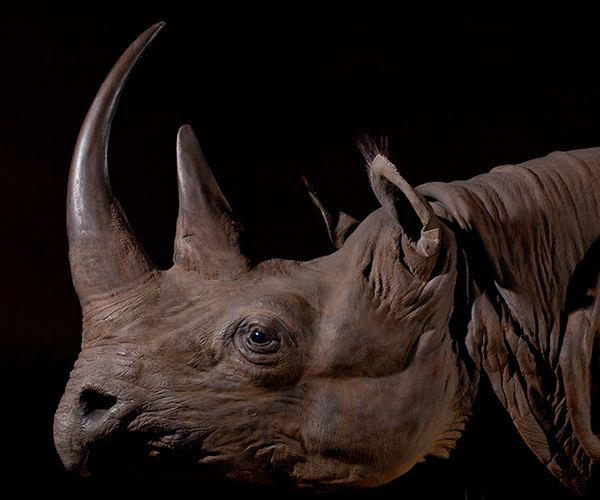
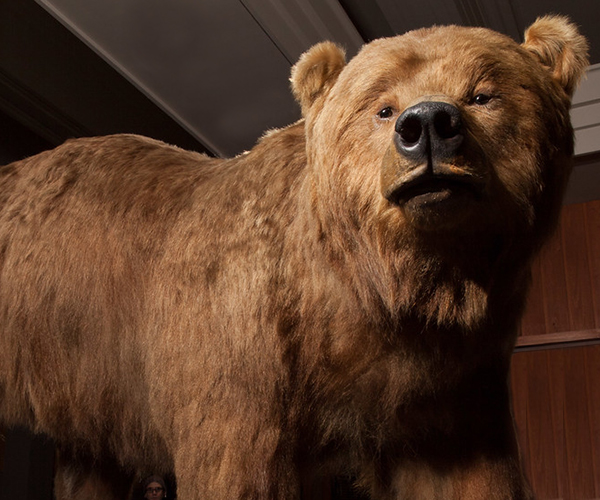
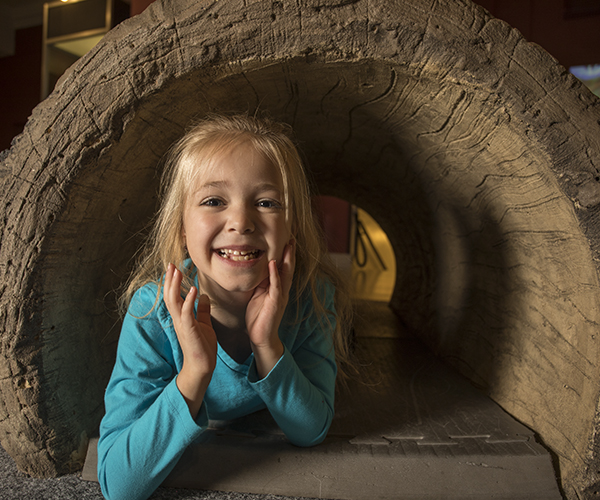
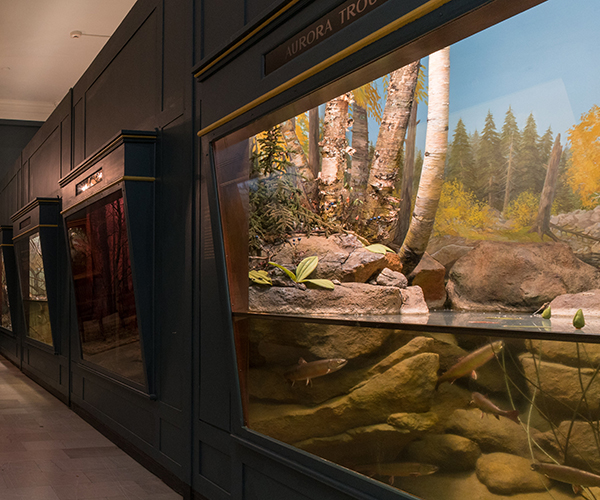
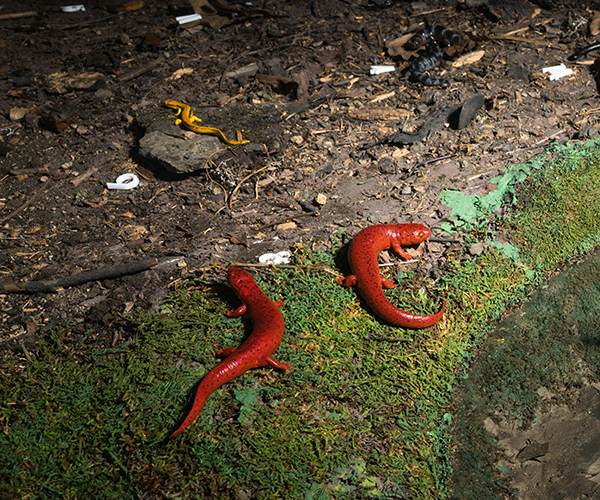
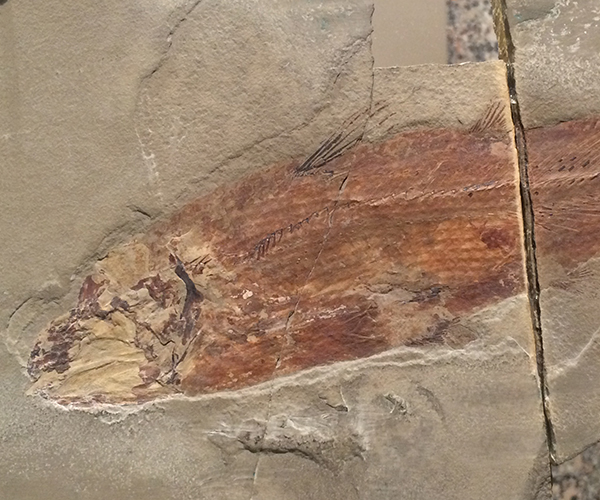
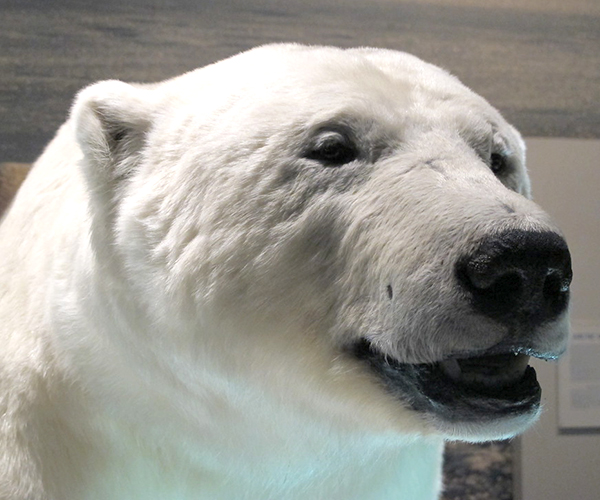
| PaleoLab
Project: Tyrannosaurus rex
Remarkably,
the skull of the type specimen of Tyrannosaurus rex—arguably
the most famous of all dinosaurs—had never been scientifically
studied since its mounting. Shortly after the first skeleton of this large predator
was collected by the famous dinosaur hunter Barnum Brown in 1902,
its skull and skeleton were reconstructed for exhibit at the American
Museum of Natural History in New York. The skeleton was sold to
Carnegie Museum of Natural History in 1942. Click here to read about the history of our T. rex's journey from New York to Pittsburgh!
Unlike
most dinosaur specimens on exhibit in Dinosaurs in Their Time, the skull
of T. rex was, for the most part, sculpted out of plaster
and contained only a few original bones and teeth. Later discoveries
of more complete skulls of this dinosaur showed that this reconstruction
was incorrect. Therefore, in 2003, the skull was carefully dismantled
by experienced preparators to expose, clean, and conserve the
original bones and teeth, which, for the first time, were
studied by paleontologists. After this study was completed,
the bones and teeth were inserted into a new skull reconstruction
based on the more complete skulls of T. rex that have
been discovered since 1902. The specimen was unveiled in 2008 in its new pose in Dinosaurs in Their Time.
Preparator's Journals
Click on any thumbnail for a larger image in a new window
April 28, 2008 - Allen
Here is a summary of what has happened over the last few years:
As described in the logs, the type skull was disassembled with all the fossil elements being cleaned and repaired. The fossil elements then went back into the collection as separate bones. Norm, Lauren, and I made molds of these elements and then casts. The type specimen casts were sent to the Museum of the Rockies where Michael Holland used cast elements from several of their specimens and the type specimen casts to reconstruct a complete skull. The skull that is on the type specimen is a composite of several tyrannosaurs including all the elements from the type specimen. Phil Fraley Productions-Pittsburgh painted the type cast skull, and Phil Fraley Productions-New Jersey mounted the type cast skull onto the type skeleton. All of the actual fossil skull elements for the type reside within the Carnegie Museum vertebrate paleontology collection.
October
21, 2003 - Amy
I finished cleaning the surangular today. As I mentioned last
week, I had to leave some of the plaster on the bone because
the bone would have fallen apart if I tried to remove it.
The surangluar was the last bone that I had to work on of
the T. rex skull, so this ends the preparation portion
of the T. rex skull project. The next stage will be
a scientific study by curator Hans Sues, PhD. Then the skull
will be reassembled correctly by an outside contractor.
| click
for a larger image: |

actual bones |

actual bones |

actual bones |

original rendition of the skull |
October
14, 2003 - Amy
Today pretty much followed the same pattern as last Tuesday.
This time I used the microjack # 4 airscribe to remove plaster
from the surangular. It is one of the most delicate airscribes
that we have. It did the job, but the work progressed very
slowly. At about 4:00 a large crack started to radiate across
the bone, so I slid the bone onto a board and carried it over
to the fume hood where I squeezed Paleobond into the crack.
I will probably not remove any more plaster from this bone,
as I fear that it will fall apart on me. I’ll check with curator
Hans Sues, who is the supervisor for this project, to see
if he agrees.
October
7, 2003 - Amy
I continued removing plaster from the surangular today. It
seemed like some of the plaster was glued to the bone, which
made it very difficult to remove. At a certain point the entire
bone seemed like it was going to fall apart, so I moved it
to the fume hood and drizzled paleobond into the many cracks.
I decided not to work on it any more today. Sometimes it is
best to set one project aside for a while and to work on something
else.
October
3, 2003 - Amy

surangular
|
The Paleolab preparators received good news
this week. The drier was installed on the air compressor
and we can now use our airscribes again. Before the drier
was installed, there was so much water in the airlines that
we could not use our air tools for fear of having them jam
up with rust. As a result we had to take projects to the
basement lab when an airscribe was required.
I spent about an hour today working on the
surangular bone. This bone is very delicate, so I was using
the airscribe to remove plaster. I’d have to stop to apply
glue periodically to keep it from crumbling into dust. The
maxilla is finished. Norm helped me remove the last piece
of iron rod.
I also trained Carol Hammer on the use of
the microjack airscribe. She will work on removing rock
from some vertebral spines of a very primitive amphibian,
Platyhistrix, from the Lower Permian (about 290 million
years ago) of New Mexico.
September
30, 2003 - Amy
I have
just about finished preparing the maxilla in the basement
preparation lab. All that needs to be done is to cut off a
piece of metal rod that is sticking out. I decided that the
only safe way to remove plaster from the surangular is with
an airscribe. Using the hammer and chisel causes too many
vibrations, which could potentially result in cracks forming
in the very thin bone.

maxilla (metal rod sticking out)
|
September
26, 2003 - Norm
Just got
back from vacation. I’m finishing work on the squamosal. As
you can see from the picture, there is still some fine work
to be done on the specimen.

plaster being chipped away
|
September
23, 2003 - Amy
The dentary
is now finished. I spent today removing the last of the plaster
from the surface of the bone. I also had to cut through a
metal rod in order to remove it. This dentary has many more
cracks in it than the right one did, and I filled them with
Paleobond. I’ll spend the rest of the day working on the surangular.

dentary
|
September
16, 2003 - Amy
Today was a tense day as my task was to separate the dentary
and surangular, which I managed to do with 20 minutes left
in the workday. It was difficult because the edges of the
dentary and surangular where the two bones articulate are
very thin and this region was covered by a considerable amount
of plaster. I had to constantly check for cracks in the bones,
especially along the edge of the surangular, and stabilize
them with the Paleobond penetrant solution. This glue is designed
to spread readily through and fill thin cracks, and it proved
to be the perfect glue to handle the cracks that kept forming
as I chipped the plaster away. So, all that remains of this
project is to finish removing the remaining plaster from the
isolated bones of T. rex skull and lower jaws.
| click
for a larger image: |

dentary and surangular |

separation well under way |

separation completed |
September
9, 2003 - Amy
As you can see from the photograph, I was able to remove a
lot of plaster today using my trusty hammer and chisels. The
surangular bone seems to be much deeper than I anticipated.
Yesterday I spent about an hour working in the basement preparation
lab on the maxilla.
| click
for a larger image: |

back of lower jaw with iron exposed |

lower jaw |

who is this? |
September
5, 2003 - Amy
I spent today using the hammer ad chisel to remove the plaster
reconstruction of the angular bone in the left lower jaw in
order to expose the underlying surangular bone. I found an
amazing number of nails in the plaster reconstruction of the
angular; in fact at one point it was bristling with nails.
I also encountered a U-shaped metal rod that I will trace
out and eventually remove.
| click
for a larger image: |

nails in lower jaw |

U-shaped iron bar |
September
4, 2003 - Norm
Work on the squamosal is just about done. I need to take it
to the basement prep lab to use the air scribe for the finishing
touches.
September
2, 2003 - Amy
It’s hard to believe that it is September already! We (Norm
and I) moved the maxilla to the basement prep lab where I
will continue working on it. I’ll be able to use the airscribe
which is much more delicate than a hammer and chisel. Then,
with the assistance of curator Dave Berman, we moved the surprisingly
heavy left lower jaw up to the Paleolab. The lower jaw of
T. rex is made up of seven bones. Of these, only the dentary
and surangular are represented in the left jaw of our T. rex.
The dentary is the tooth bearing bone whereas the surangular
extends along the outer surface of the jaw from the dentary
to the articular bone, which articulates with the skull.
| click
for a larger image: |

Dave and Amy |

lower jaw |
August
28, 2003 - Norm
Just about
finished with the squamosal. If anybody out there needs nails
I may be able to supply them for I find more buried in the
plaster everyday.

nails in
plaster
|
August
27, 2003 - Norm
As I remove the plaster from the squamosal I seem to be running
into an interesting amount of hardware. Can you pick from
the pictures three of the five items I’ve found. A nail, a
screw, a staple, the kitchen sink , Jimmy Hoffa? We’ll have
the answer next week.
| click
for a larger image: |

what is this? |

the kitchen sink? |

huh? |
August
22, 2003 - Amy
It’s a little after lunchtime and I just finished removing
the plaster from the dentary. I also squeezed some more paleobond
into the cracks to help stabilize them. The dentary will be
moved to the basement storeroom either today or Monday. I’ll
spend the rest of the day removing plaster from the left lacrimal.
| click
for a larger image: |

dentary plaster free |

lacrimal with some plaster remaining |
August
20, 2003 - Norm
Back in
Paleolab today I continued working on the squamosal. I removed
the iron beam running across the bottom and a lot of the remaining
plaster.

iron beam
removed
|
August
19, 2003 - Amy
I was
able to free the dentary from the reconstructed portion of
the lower jaw late yesterday. The remainder of Tuesday and
all of today were spent removing a considerable amount of
plaster from the inner portion of the dentary with a hammer
and chisel. As usual, an iron rod had to be cut. This rod
actually ran inside of a hollow portion of the front part
of the bone.

Amy holding
plaster separated from dentary
|
August
18, 2003 - Amy
Norm and I brought up the right lower jaw from the basement
storeroom this morning. Only one real bone in this jaw is
the dentary, which is the tooth bearing bone. So far today,
I have dug a trench between the bone of the dentary and the
plaster reconstruction. Surprisingly, I’ve only encountered
two metal rods. These will be cut through using the dremel
tool and then the handsaw will be employed to free the dentary.
| click
for a larger image: |

removing dentary from lower jaw |

exposing iron rods |
August
12, 2003 - Amy
Today I was able to successfully separate the left maxilla
and lacrimal. I continued chipping away the plaster and removed
the two remaining iron rods that had extended along the midlength
of the skull. Then I removed plaster to expose the dorsal
(top) edge of the maxilla and lacrimal. Once this was done
I was able to chip the plaster away from where the maxilla
and lacrimal abutted each other. The next task was to dig
a trench between the descending arm of the lacrimal and the
maxilla. I encountered two metal rods which Norm cut with
the dremel tool. Finally, after digging the trench for a while
longer, the two bones cleanly separated from each other. The
rest of the afternoon was spent chipping plaster off of the
maxilla.
| click
for a larger image: |

separating lacrimal from maxilla |

separating lacrimal from maxilla |

Amy holding separated lacrimal |
August
5, 2003 - Norm
Today
I’m beginning to remove the overburden of plaster that covers
the squamosal. I removed the iron bar running along the lower
half with a hammer and chisel and pin vises of various sizes.

iron
bar and plaster being removed
|
July
30, 2003 - Norm

final
bone removed
|
Today
Amy and I removed the last real bone from the back of the
skull (squamosal). Now all the real bones are ready to be
cleaned of the remaining plaster.
July
29, 2003 - Amy
Today we successfully removed the left maxilla and lacrimal.
I had to finish digging the trench between the metal rod and
the right maxilla and lacrimal. Then, Norm used the drywall
saw and wire cutters to cut a thick metal wire running across
the width of the skull. The next task was to cut a very thick
iron rod that formed a support between the two maxillae. Norm
used the dremel tool for cutting, while Allen Campbell, volunteer
Jason Pardo, and I held the skull steady. The right and left
halves of the remaining portion of the skull were easily separated
after the rod was severed. I spent the rest of the day using
a very small chisel and hammer to chip plaster away from the
joined left maxilla and lacrimal.
| |

Amy removing plaster |

cutting skull |

cutting ironwork with dremel tool |

split skull; real bones |
July
28, 2003 - Amy
The only real bones left in the front portion of the skull
are the left maxilla (upper jaw bone) and lacrimal. To free
these bones from the plaster reconstruction, Norm and I decided
that first we should cut the skull roughly in half along its
length. I began this process by using the hammer and chisel
to dig a trench along the outer side of the outermost iron
rod. After the trench was well underway, I began working on
separating the right premaxilla (the other bone that makes
up the upper jaw) from the right maxilla. I started to saw
where the premaxilla and maxilla meet, but this wasn’t very
productive. So then I tried using the hammer and chisel to
remove some plaster between the maxilla and premaxilla. After
about four taps with the hammer, both the right and left premaxilla
separated cleanly from the respective maxillae.
| |

premaxilla being removed |

Amy removing premaxilla |

premaxilla in sandbox |
July
25, 2003 - Amy
Today we were able to free the lacrimal bone from the skull.
First, I finished removing the plaster from the iron rod.
It only extended part-way down the length of the skull, so
I was able to lift it out instead of having to cut through
it. I then used the hammer and chisel to dig a trench along
the forwardly directed arm of the lacrimal. Then we used a
drywall saw to cut through the trench. Next, with several
of our volunteers holding the skull stable, Norm used the
cast cutter to try to cut the lacrimal away from the upper
jaw bone. He ran into another iron rod, so I had to use a
hammer and chisel to free it. Fortunately the vibrations from
using the hammer and chisel caused the lacrimal bone to separate
cleanly from the surrounding plaster.
| |

Amy, Norm and Jason removing lacrimal |

using cast cutter |

using hacksaw |

lacrimal in sandbox |
July
23, 2003 - Norm
I am continuing
with the removal of the squamosal from the back half of the T. rex skull. Because the plaster in this area is very
thick, I’ve been using the cast cutter and an electric drill
to work through the plaster, along with a hammer and chisel.
If all goes well, the next time I’m in Paleolab we should
have the squamosal in hand.

squamosal
removal in progress
|
July
22, 2003 - Norm

removing
iron bar
|
Today
using a hammer and chisel, pin vise, and cast cutter, I was
able to remove the iron bar surrounding the large bone at
the back of the skull (squamosal). Now, I should be able to
remove the bone without cutting more than one iron bar. Today
I am working on removing the squamosal bone from the T.
rex skull.
July 22, 2003 – Amy
This bone looks like an upside-down L. The descending arm
of the L forms a bony strut between the orbit (eye opening)
and an opening in front of the orbit (anteorbital fenestra).
The other arm of the L is directed toward the front of the
skull. I am using a hammer and chisel to chip the plaster
away from the right outermost of four iron rods that extend
the length of the top part of the skull. Then, with the help
of Norm, I will cut the iron rod and remove it. Once the rod
is out, I can dig a trench alongside the lacrimal to free
it from the rest of the skull.

removing
ectopterygoid
|
July
15, 2003 - Norm
Piecing together
the skull of a new dinosaur for the first time can be a complicated
task. Sometimes mistakes can occur. When the skull of T. rex was initally reconstructed by American Museum of Natural History in the early 1900s, a
bone called the right ectoptygoid was mistaken for the right
postorbital bone and placed in the wrong location. Our new reconstruction restores the
right ectoptygoid to its proper place.Today Amy
Henrici and I removed the ectopterygoid that, according to
Ken Carpenter’s paper on variation in T. rex skulls,
“Osborn had erroneously used ... as a right postorbital in
the reconstructed skull.” We were able
to work around the supporting iron rods running through the
skull, which made it less time consuming. Amy will now take
this bone and remove the remaining plaster using an airscribe
and pin vise.
July
12-13, 2003 - Yvonne
Norm (the head honcho on this project) assigned the rear portion
of the skull as the next task. My job this weekend was exploratory.
I again solidified the real bone with an ultra-thin glue.
Then I took out the magnets. Using magnets, we can trace
most of the rods beneath the plaster (thank goodness they
didn’t use brass or aluminum!). I started drawing on the
skull. Have to admit that was fun. Yellow chalk for metal
rods, white chalk for bone that was not visible from the other
side. I also marked possible cut sites. We wanted to make
very conservative cuts, far from the bone. I started exploring
the plaster around the bone, looking for the edges of the
bones. Some of the bone extended more than an inch behind
plaster. The more information we can gather before cutting,
the safer the project will be for the specimen, and the less
likely we will be to say OOPS!
July
9, 2003 - Norm
Today we cut the skull into two parts. After consulting with
Hans and Chris, it was decided that the best way to get at
the real bones was to start by separating the back of the
skull from the front and then taking the two real bones from
the massive back of the skull, which would make working on
them much more manageable. Yvonne and I were helped by Allen
Campbell, while Ron and Mindy recorded the process. As can
be seen from the pictures, the skull was built to last when
it was assembled at the American Museum of Natural History.
Iron rods run throughout the skull, and after we cut through
the plaster with a cast cutter, we used a dremel tool with
a metal cutting blade to get through the rods without causing
any damaging vibrations to the original bones. It took most
of a nerve-wracking day, but we were finally successful. Thanks
to all for the help.
| |

cutting back of
T. rex skull |

back end of skull coming off |

front of skull |
July
3, 2003 - Norm
I
was talking to Conservator Barb Hamann about various conservation
techniques. She suggested that I try a magnet to find where
in the plaster the iron supporting rods might be. I remembered
that a former volunteer, Ralph Wells, a Westinghouse engineer,
had given us a number of very strong magnets. I tried one
and was able to trace where in the skull the rods were running.

Preparator Yvonne Wilson applying hardener
|
July
2, 2003 - Yvonne
I tried
to solidify the skull today. It has to be treated before we
take it apart. I used an ultra-thin glue to penetrate the
cracks in the bone. It often zips up into cracks that you
didn’t even know were there. Two curators, Norman, and I
all discussed strategies for taking the skull apart. Although
it shouldn’t be that hard to remove the plaster, it still
has to be planned in order to proceed smoothly. Norman marked
the skull in chalk where we plan to divide the skull initially.
Let’s hope we chose wisely.
July
1, 2003 - Norm

L-R: Preparator Yvonne Wilson, Dept. Chair Chris Beard, Former Associate Director for Research
and Collections Hans-Dieter Sues
|
Hans, Chris
Beard, Yvonne and I had a meeting in Paleolab and decided
that the best way to deconstruct the T. rex skull is
to cut it in half with a cast cutter to separate the front
and back halves of the skull. Yvonne spent part of the day
using Paleobond penetrant to stabilize the bone, because in
many places cracks can be seen.
June
20, 2003 - Norm
Mindy took some professional photos of me removing the iron
work from the skull. She will try to take photos throughout
the whole preparation process.
| |

removing ironwork |

applying hardener
(a kind of glue) |
June
17, 2003 - Norm
Amy
Henrici and I had a meeting in Paleolab with Hans-Dieter Sues.
Hans suggested how to proceed with the preparation to remove
the real bones from the parts that had been restored in plaster.
Amy and I took the lower jaws to the Big Bone Room for safekeeping
until they are ready to be worked on. I
took some digital photos of the T. rex skull on its padded,
circular table. This table, built specifically to handle a T. rex skull, is four feet in circumference with a
capacity of 4,000 pounds. It rotates 360 degrees and has a
hydraulic
system that allows it be raised and lowered 12 inches. For
additional support, preparators placed sandbags underneath
parts of the skull. Such sandbags conform to the shape of
the skull and help reduce stress on the fossilized material. Then I looked over some of the scientific literature
gathered by Amy Henrici and Yvonne Wilson.
June
16, 2003 - Norm
Today we removed the type specimen of T. rex from the
exhibit space in Dinosaur Hall. The exhibitions staff (Jim Senior,
Bill May, Don Vojtko, Don Cromer) and I started by taking
off the lower jaws from their iron work. After the lower jaws
were safely removed, we all took hold of a section of the
skull and carefully started to unscrew it from the threaded
pipe on which it was balanced, removing the skull in the same way that you might
twist the cap off a bottle. This required some not-so-dainty
men to walk in circles on a very small platform in order to
twist the skull from the pipe and then carry it to a waiting
cart. The
skull was then carefully wheeled into
PaleoLab, the museum’s fossil preparation laboratory.The skull is now safely sitting in Paleolab, so
miracles do happen.
| |

lifting from base |

on the cart |

moving to PaleoLab |

on table in lab |
Return to Preparator's Journals |